
2 月 . 16, 2025 10:22 Back to list
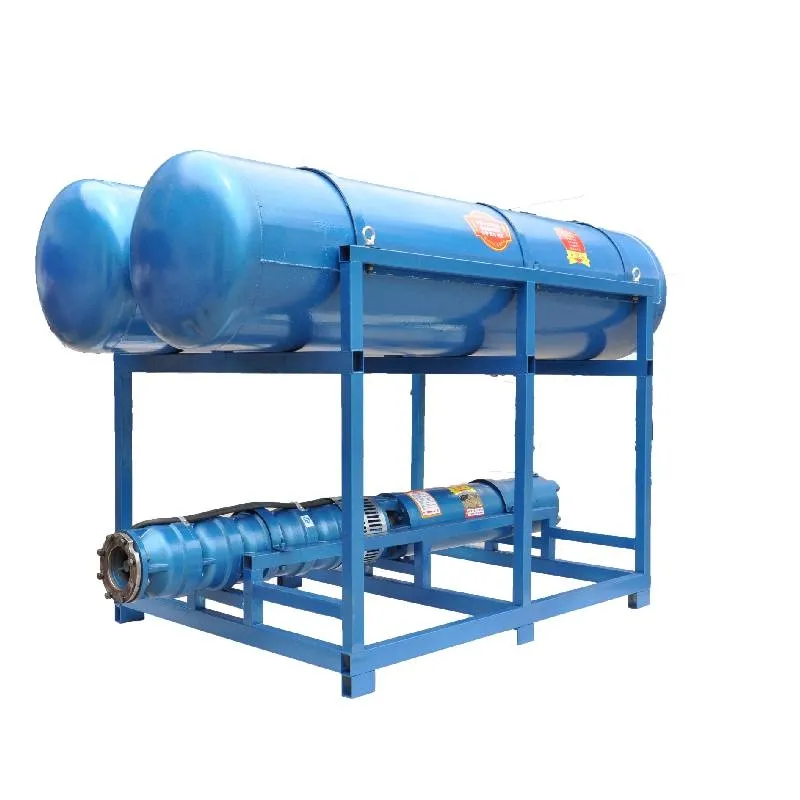
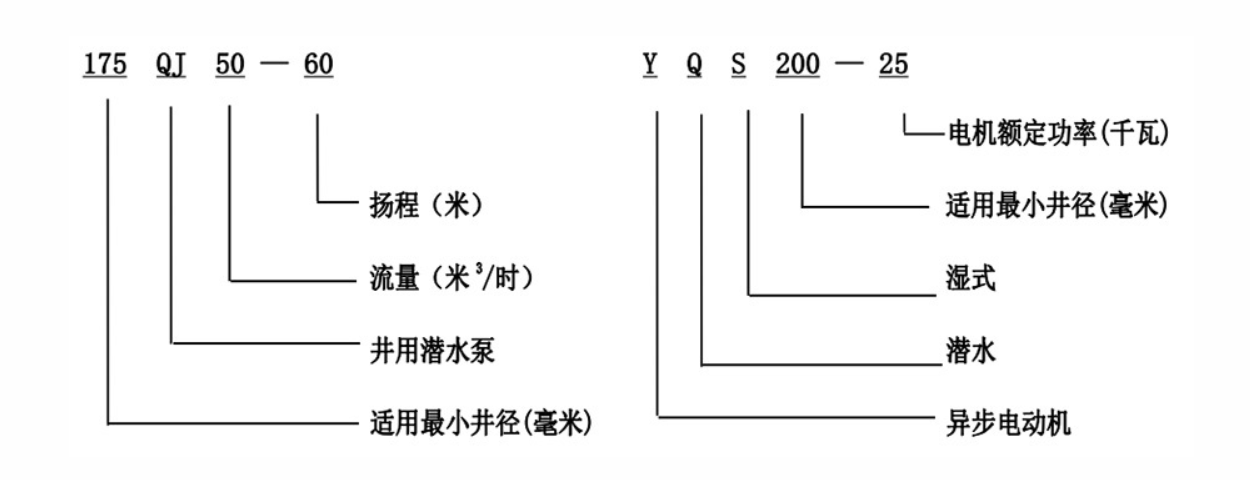
175QJ Deep Well Submersible Pump
Removing a submersible well pump can seem daunting, but with the right tools, knowledge, and safety precautions, it becomes a manageable task. Many homeowners rely on well water systems, and understanding how to maintain them is crucial. This guide presents a detailed, experience-based approach to pulling a submersible well pump, incorporating insights from seasoned experts in the field.
Once disconnected, the hard work begins hoisting the pump. For pumps less than 1 horsepower and around 100 feet deep, a few strong individuals leaving enough slack should suffice. For deeper or more substantial pumps, mechanical assistance such as a tripod hoist or winch system can prevent injury. Slowly and steadily pulling up the pump and attached piping ensures that the pipe isn’t damaged. Be cautious as buildup on the pipe can cause it to stick – gentle persistence is key. As the pump nears the surface, be ready to manage its removal without letting it drop. Missteps at this point can result in significant setbacks and potential damage. Once fully out, assess the pump and piping for blockages, cracks, or other service issues. At this stage, replacing worn parts or the entire pump might be more efficient, ensuring optimal operation for your water system’s future. Throughout the process, documentation serves a dual purpose aiding assembly and offering insight for future maintenance tasks. Keeping records not only enhances the longevity of your system but builds your expertise in well management, increasing your home’s self-sufficiency. For those new to well systems, acknowledging the complexity and seeking expert advice when needed reinforces trustworthiness and reliability. Professionals experienced in well pump maintenance can provide invaluable advice, specific adjustments, or services tailored to your setup. This partnership is advantageous, blending your growing skills with their extensive knowledge. Maintaining these systems demands diligence and respect for the intricate balance between technology and nature. A successful operation is not simply about removing a pump but ensuring the water system's longevity and reliability for years to come.
Once disconnected, the hard work begins hoisting the pump. For pumps less than 1 horsepower and around 100 feet deep, a few strong individuals leaving enough slack should suffice. For deeper or more substantial pumps, mechanical assistance such as a tripod hoist or winch system can prevent injury. Slowly and steadily pulling up the pump and attached piping ensures that the pipe isn’t damaged. Be cautious as buildup on the pipe can cause it to stick – gentle persistence is key. As the pump nears the surface, be ready to manage its removal without letting it drop. Missteps at this point can result in significant setbacks and potential damage. Once fully out, assess the pump and piping for blockages, cracks, or other service issues. At this stage, replacing worn parts or the entire pump might be more efficient, ensuring optimal operation for your water system’s future. Throughout the process, documentation serves a dual purpose aiding assembly and offering insight for future maintenance tasks. Keeping records not only enhances the longevity of your system but builds your expertise in well management, increasing your home’s self-sufficiency. For those new to well systems, acknowledging the complexity and seeking expert advice when needed reinforces trustworthiness and reliability. Professionals experienced in well pump maintenance can provide invaluable advice, specific adjustments, or services tailored to your setup. This partnership is advantageous, blending your growing skills with their extensive knowledge. Maintaining these systems demands diligence and respect for the intricate balance between technology and nature. A successful operation is not simply about removing a pump but ensuring the water system's longevity and reliability for years to come.
Latest news
-
Your Guide to Deep Well Pumps
NewsOct.31,2024
-
Why Choose a Stainless Steel Deep Well Pump?
NewsOct.31,2024
-
Understanding Water-Filled Submersible Pumps
NewsOct.31,2024
-
Understanding SS Submersible Pumps
NewsOct.31,2024
-
Reliable Submersible Well Pumps for Your Water Supply Needs
NewsOct.31,2024
-
Choosing the Right Submersible Pump for Your Water Management Needs
NewsOct.31,2024
-
 Understanding Water-Filled Submersible PumpsWhen it comes to selecting the right pump for your water management needs, understanding the different types available is crucial.Detail
 -
 Guide to Installing a Deep Well Submersible PumpWhen dealing with deep wells, a deep well submersible pump is often the most effective solution for extracting water from significant depths.Detail
 -
 Finding the Right Submersible PumpWhen seeking an efficient solution for pumping water from deep wells, sumps, or other applications, the submersible pump is a leading choice.Detail