
2 月 . 18, 2025 00:17 Back to list
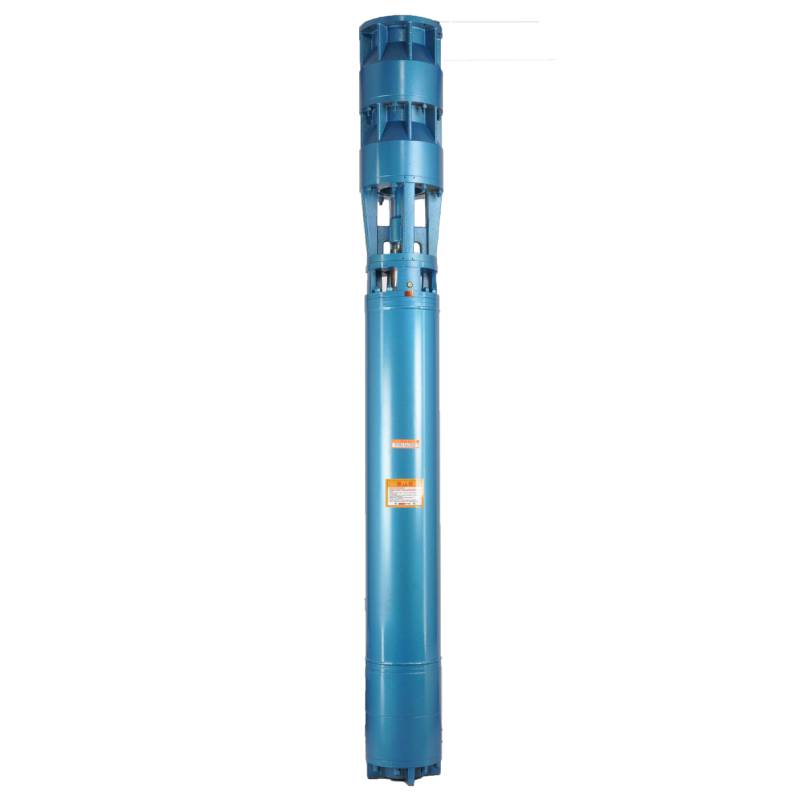
175QJ Deep Well Submersible Pump
Removing a submersible well pump can be a daunting task, especially for those not versed in the intricacies of well systems. However, understanding the process and taking necessary precautions ensures the job is done efficiently and safely. Here’s a comprehensive guide to assist you through this process, drawing from professional experience and best practices.
As you’re pulling, the safety rope, which is a necessity in professional installations, can assist in lifting and provide a fallback should the main pipe fail. Ensure the safety rope is also extracted evenly, preventing it from catching or tangling. During extraction, conduct a visual inspection of the pipe and wires. Look for signs of wear, fraying, or corrosion—these could indicate further repairs are required. Once the pump is visible, handle it carefully. Submersible pumps are robust, but rough handling can damage the internal components. With the pump fully removed, inspect the unit itself. Check the intake screen for blockages and the impellers for visible signs of damage. Often, cleaning or replacing one of these components can solve common well issues without requiring a full pump replacement. If you’re troubleshooting a faulty pump, consider factors such as reduced water pressure, unusual noises, or increased electricity bills. These symptoms can indicate a failing motor or impeller. In such cases, consulting with a professional for a detailed assessment can be invaluable, ensuring you don’t overlook crucial problems. For those replacing the pump, ensure the new unit matches the specifications of the old one—incorrect power ratings or size can lead to inefficient operation or further damage. Additionally, use new O-rings and gaskets to prevent leakage, and always consult the manufacturer's installation manual for specific guidelines. In conclusion, removing a submersible well pump is an intricate process that balances technical skill with safety awareness. To ensure best outcomes, meticulous attention to detail and adherence to safety standards are paramount. By following these guidelines, you will uphold the longevity of your well system and maintain a reliable water supply to your property. Always remember, when in doubt, reaching out to a professional can save you time and long-term expenses, providing peace of mind as you navigate the intricacies of well maintenance.
As you’re pulling, the safety rope, which is a necessity in professional installations, can assist in lifting and provide a fallback should the main pipe fail. Ensure the safety rope is also extracted evenly, preventing it from catching or tangling. During extraction, conduct a visual inspection of the pipe and wires. Look for signs of wear, fraying, or corrosion—these could indicate further repairs are required. Once the pump is visible, handle it carefully. Submersible pumps are robust, but rough handling can damage the internal components. With the pump fully removed, inspect the unit itself. Check the intake screen for blockages and the impellers for visible signs of damage. Often, cleaning or replacing one of these components can solve common well issues without requiring a full pump replacement. If you’re troubleshooting a faulty pump, consider factors such as reduced water pressure, unusual noises, or increased electricity bills. These symptoms can indicate a failing motor or impeller. In such cases, consulting with a professional for a detailed assessment can be invaluable, ensuring you don’t overlook crucial problems. For those replacing the pump, ensure the new unit matches the specifications of the old one—incorrect power ratings or size can lead to inefficient operation or further damage. Additionally, use new O-rings and gaskets to prevent leakage, and always consult the manufacturer's installation manual for specific guidelines. In conclusion, removing a submersible well pump is an intricate process that balances technical skill with safety awareness. To ensure best outcomes, meticulous attention to detail and adherence to safety standards are paramount. By following these guidelines, you will uphold the longevity of your well system and maintain a reliable water supply to your property. Always remember, when in doubt, reaching out to a professional can save you time and long-term expenses, providing peace of mind as you navigate the intricacies of well maintenance.
Latest news
-
Your Guide to Deep Well Pumps
NewsOct.31,2024
-
Why Choose a Stainless Steel Deep Well Pump?
NewsOct.31,2024
-
Understanding Water-Filled Submersible Pumps
NewsOct.31,2024
-
Understanding SS Submersible Pumps
NewsOct.31,2024
-
Reliable Submersible Well Pumps for Your Water Supply Needs
NewsOct.31,2024
-
Choosing the Right Submersible Pump for Your Water Management Needs
NewsOct.31,2024
-
 Understanding Water-Filled Submersible PumpsWhen it comes to selecting the right pump for your water management needs, understanding the different types available is crucial.Detail
 -
 Guide to Installing a Deep Well Submersible PumpWhen dealing with deep wells, a deep well submersible pump is often the most effective solution for extracting water from significant depths.Detail
 -
 Finding the Right Submersible PumpWhen seeking an efficient solution for pumping water from deep wells, sumps, or other applications, the submersible pump is a leading choice.Detail