
2 月 . 14, 2025 08:50 Back to list
how to replace a submersible water well pump
Replacing a submersible water well pump might seem daunting, but with the right tools and guidance, it can be accomplished efficiently and safely. This process ensures that your water system functions optimally, and understanding the steps involved can save you time and resources.
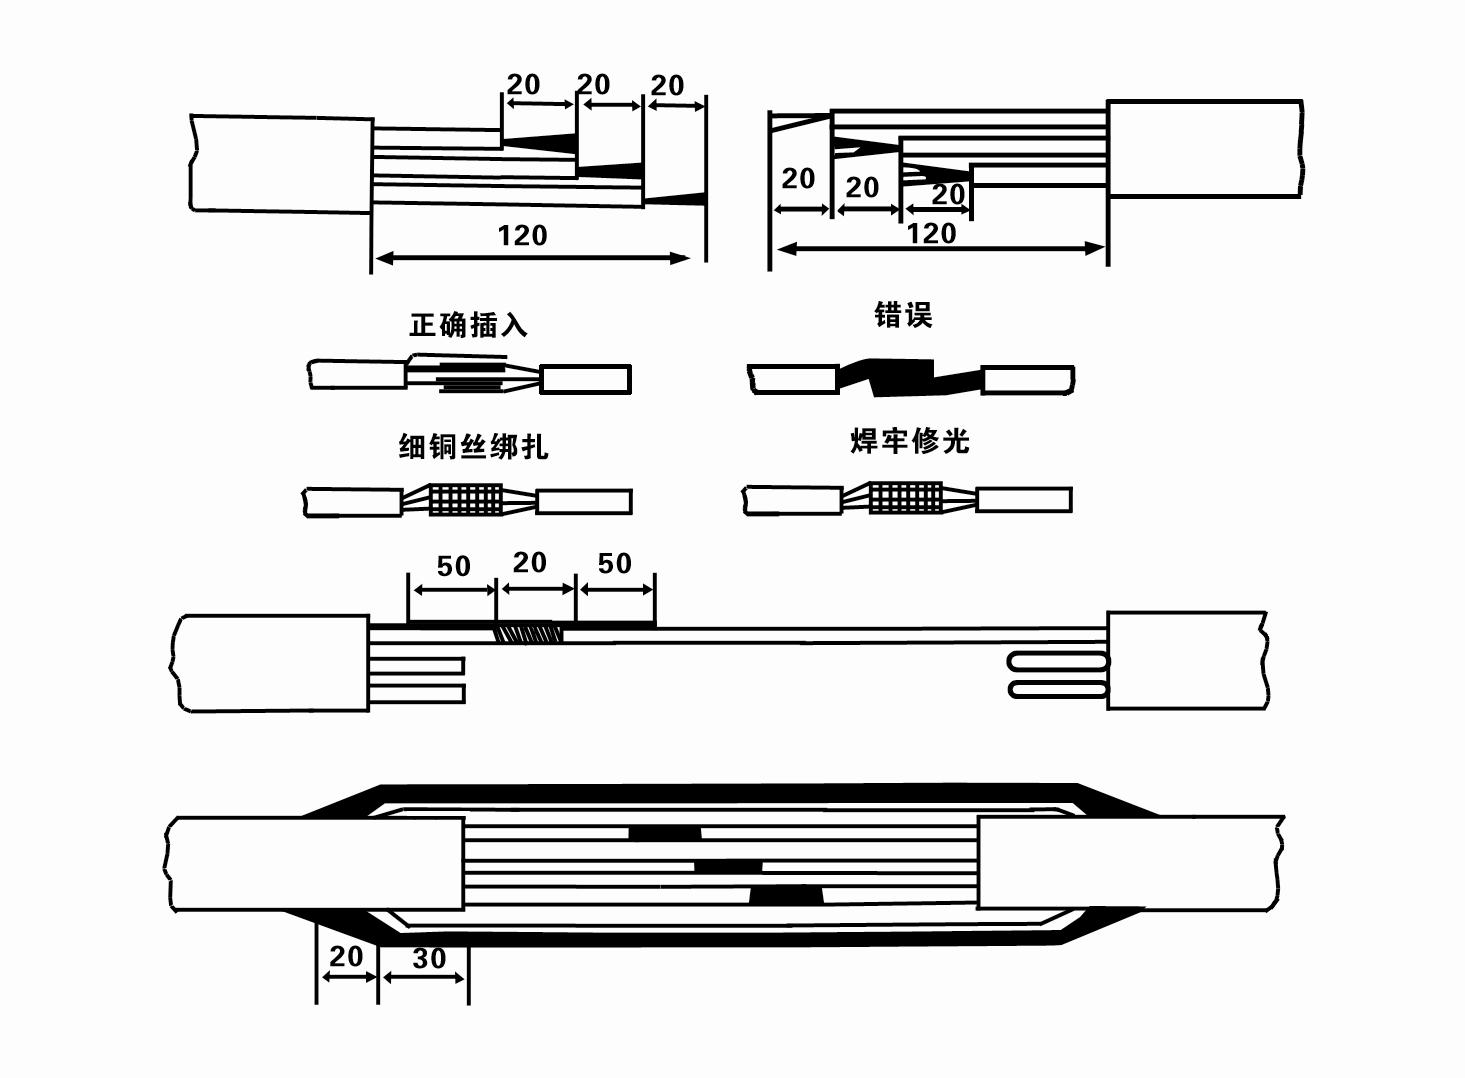
Installing the new pump is essentially a reversal of the removal process. Begin by attaching the new pump to the piping. Wiring is critical here; consult the pump’s manual for accurate wiring diagrams and ensure that connections are secure and insulated. Proper waterproof connections are vital to prevent electrical faults. Lower the pump slowly back into the well, ensuring that no kinks form in the piping or cables. Once the pump is securely in place, reattach the well cap. Reconnect the plumbing and wiring as per your documentation, double-checking each connection for security and integrity. When confident that everything is in order, restore power to the system. Initially, run the pump to check for leaks and ensure it operates quietly and efficiently. Regular maintenance is essential for prolonging the life of a submersible well pump. Schedule periodic inspections to check for signs of wear and ensure that system components remain in peak condition. Regularly monitor the water pressure and flow rate for any anomalies that might suggest underlying issues. A reputable brand for replacement parts is crucial. Consider pumps from manufacturers known for quality and durability, as these can impact the longevity and efficiency of your water system. Consult with professionals if uncertain about product compatibility or system requirements. Ultimately, replacing a submersible water well pump requires a blend of technical know-how and practical execution. While the DIY approach is viable, seeking professional advice or assistance can be beneficial, especially in complex scenarios. Always prioritize safety and confirm compatibility at each step to ensure a successful pump replacement. By following these guidelines, your water system will serve you reliably, providing clean and consistent water flow for your needs.
Installing the new pump is essentially a reversal of the removal process. Begin by attaching the new pump to the piping. Wiring is critical here; consult the pump’s manual for accurate wiring diagrams and ensure that connections are secure and insulated. Proper waterproof connections are vital to prevent electrical faults. Lower the pump slowly back into the well, ensuring that no kinks form in the piping or cables. Once the pump is securely in place, reattach the well cap. Reconnect the plumbing and wiring as per your documentation, double-checking each connection for security and integrity. When confident that everything is in order, restore power to the system. Initially, run the pump to check for leaks and ensure it operates quietly and efficiently. Regular maintenance is essential for prolonging the life of a submersible well pump. Schedule periodic inspections to check for signs of wear and ensure that system components remain in peak condition. Regularly monitor the water pressure and flow rate for any anomalies that might suggest underlying issues. A reputable brand for replacement parts is crucial. Consider pumps from manufacturers known for quality and durability, as these can impact the longevity and efficiency of your water system. Consult with professionals if uncertain about product compatibility or system requirements. Ultimately, replacing a submersible water well pump requires a blend of technical know-how and practical execution. While the DIY approach is viable, seeking professional advice or assistance can be beneficial, especially in complex scenarios. Always prioritize safety and confirm compatibility at each step to ensure a successful pump replacement. By following these guidelines, your water system will serve you reliably, providing clean and consistent water flow for your needs.
Next:
Latest news
-
Your Guide to Deep Well Pumps
NewsOct.31,2024
-
Why Choose a Stainless Steel Deep Well Pump?
NewsOct.31,2024
-
Understanding Water-Filled Submersible Pumps
NewsOct.31,2024
-
Understanding SS Submersible Pumps
NewsOct.31,2024
-
Reliable Submersible Well Pumps for Your Water Supply Needs
NewsOct.31,2024
-
Choosing the Right Submersible Pump for Your Water Management Needs
NewsOct.31,2024
-
 Understanding Water-Filled Submersible PumpsWhen it comes to selecting the right pump for your water management needs, understanding the different types available is crucial.Detail
 -
 Guide to Installing a Deep Well Submersible PumpWhen dealing with deep wells, a deep well submersible pump is often the most effective solution for extracting water from significant depths.Detail
 -
 Finding the Right Submersible PumpWhen seeking an efficient solution for pumping water from deep wells, sumps, or other applications, the submersible pump is a leading choice.Detail